Portmanteau


Tools
Adobe Photoshop, Illustrator, InDesign, Rhino 7, CNC Milling
Context
The aim of this project is to prototype multifunctional furniture solutions, specifically creating a portmanteau—a piece of furniture with at least two functions. Utilizing a single 4x8 ft piece of plywood, my design focuses on crafting a versatile entryway piece that seamlessly integrates multiple functionalities into a cohesive unit. The focus of this design is on optimizing usability by combining diverse features, resulting in an efficient and multifunctional entryway station.
Role
Product Designer & Digital Designer
The Challenge
The project presented a few restraints: constructing the piece using only a single 4x8 ft piece of plywood, leaving no room for errors. Additionally, the use of wood glue was prohibited, necessitating the employment of various types of joinery and fasteners. This required meticulous planning and precision in both the design and construction phases. Successfully navigating these constraints to produce a refined and functional prototype was a key aspect of the project.
Ideation
Conceptualizing the Functions
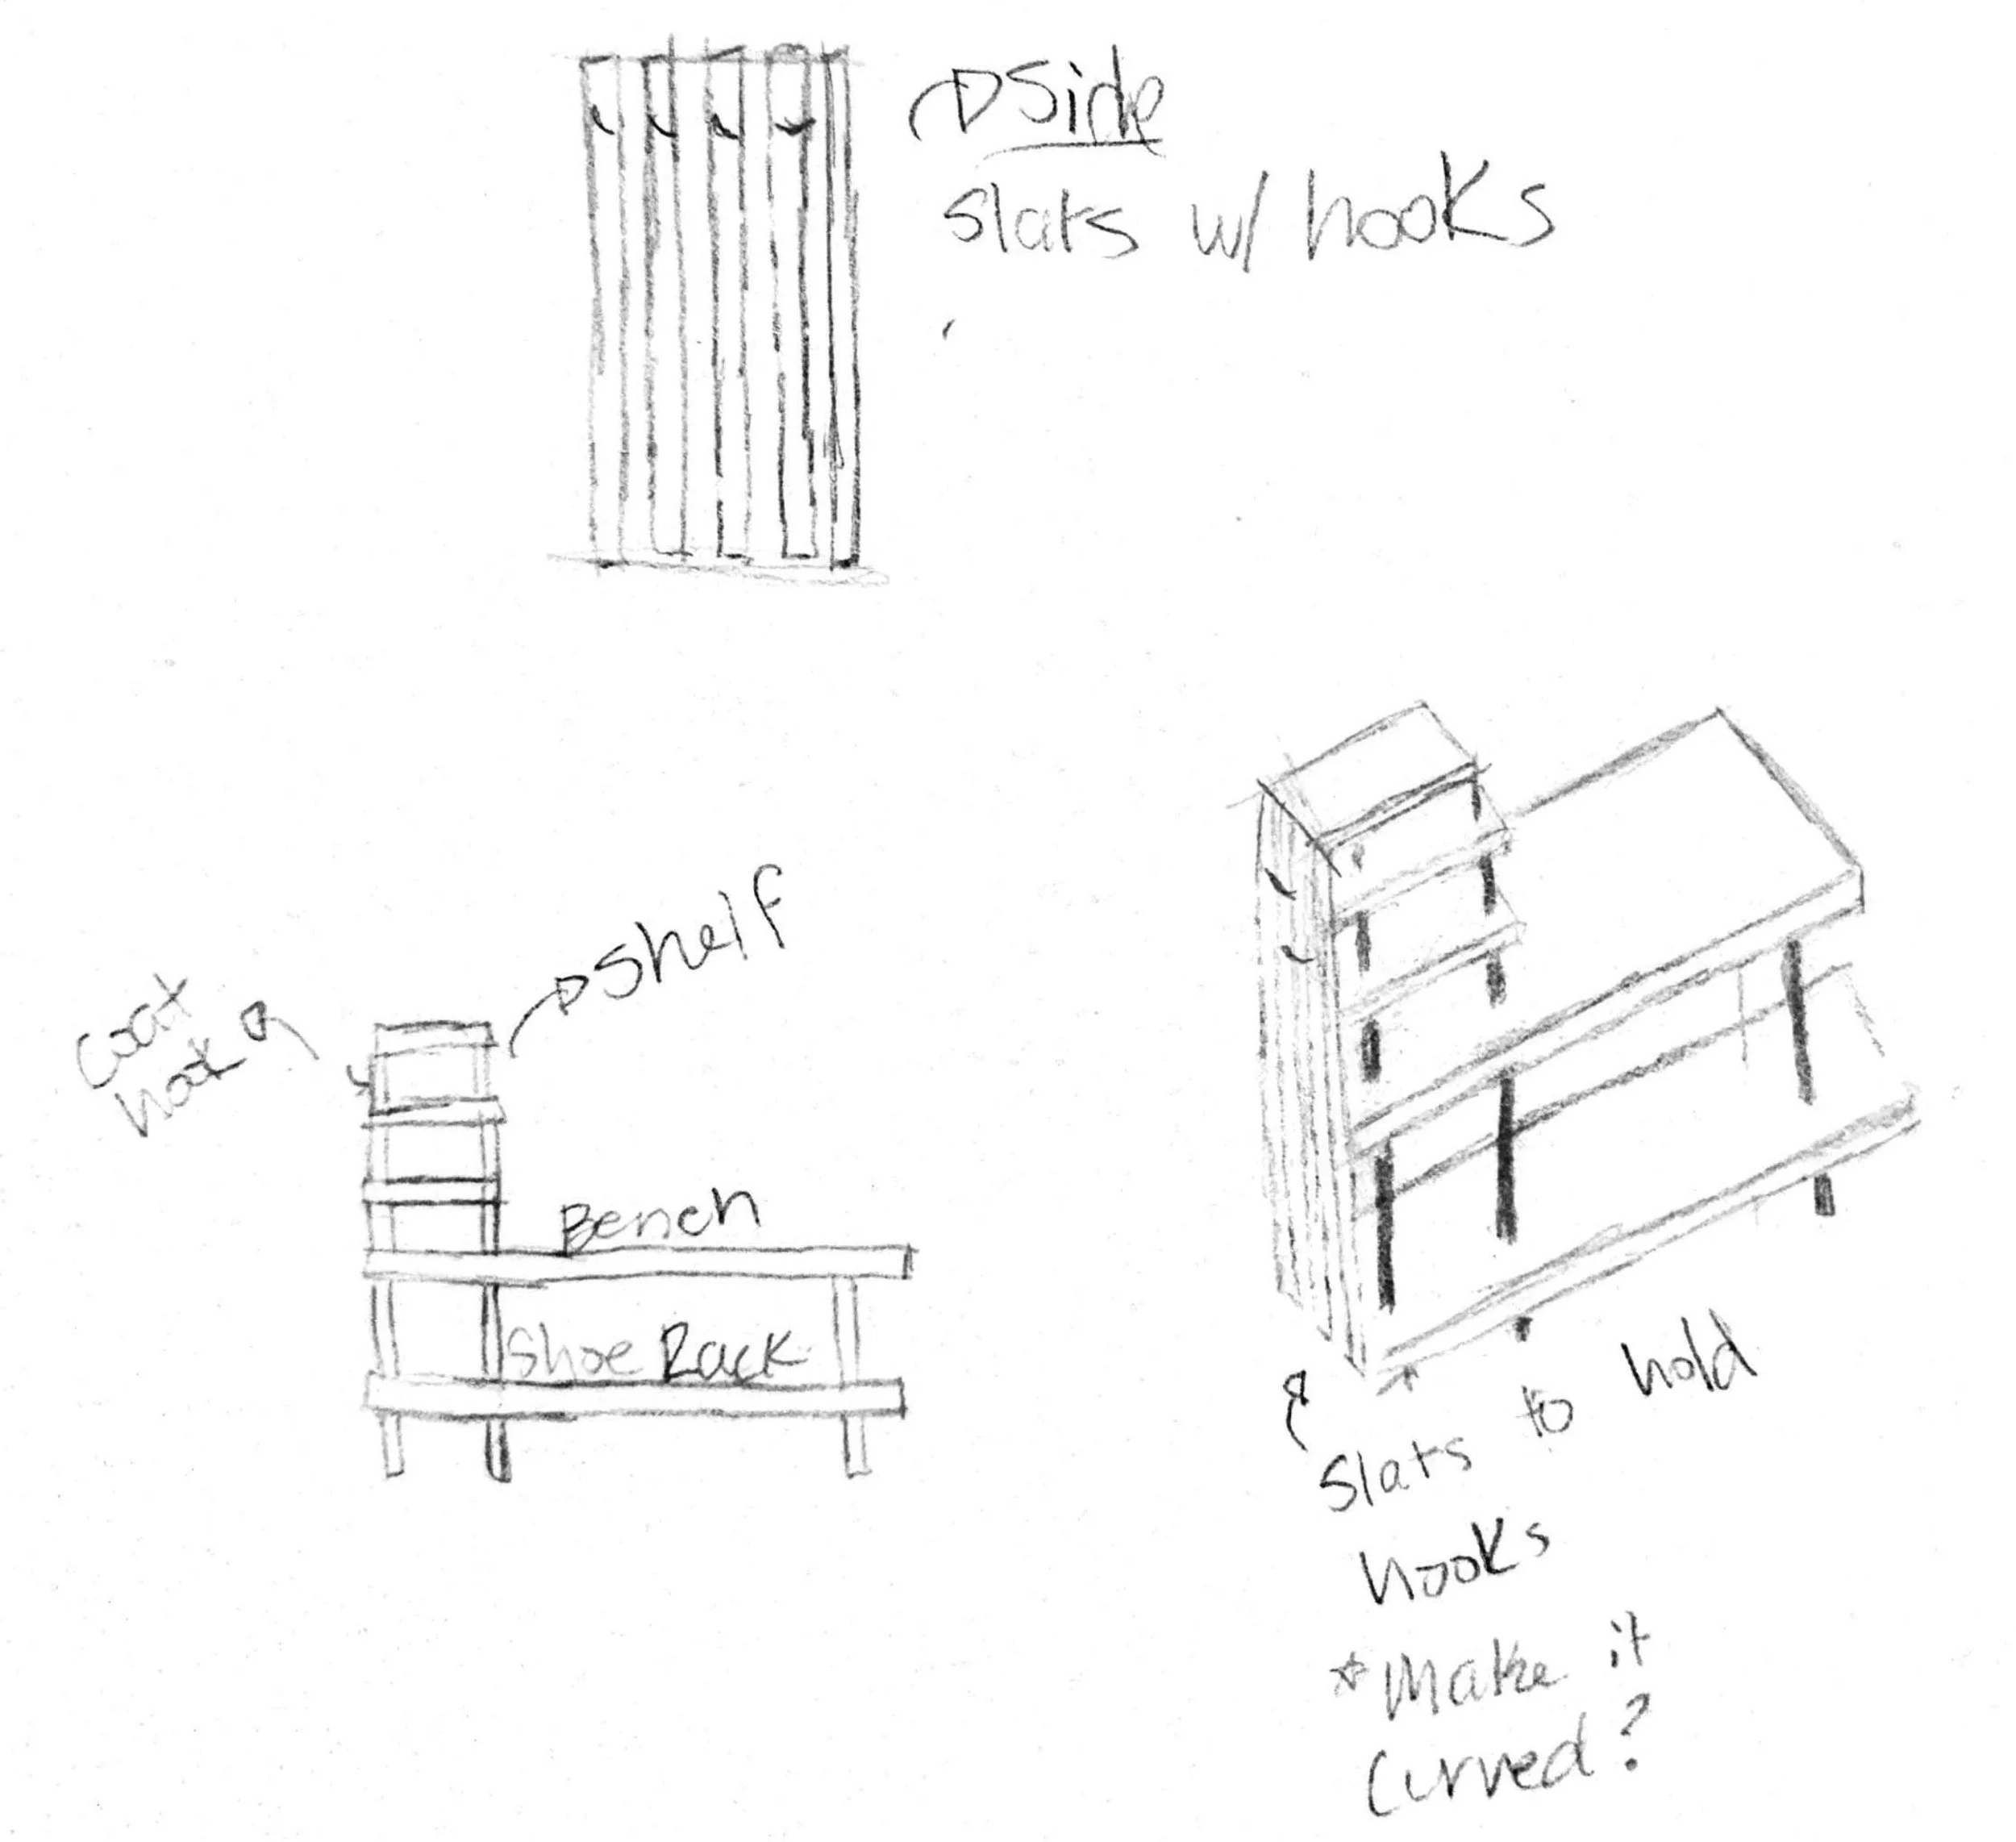
In the ideation and design phase, the primary focus was on conceptualizing a furniture solution and determining which functions to incorporate. I was drawn to the idea of crafting a piece specifically tailored for the entryway of a home. In this context, the initial concept revolved around seamlessly integrating a bench with shelves, which then extended into hooks.
Challenges Moving Forward
However, this initial design posed a couple of challenges. Firstly, the horizontal layout didn't provide enough height for the hooks, and the overall design felt somewhat lacking in visual interest. To address these issues, a decision was made to pivot towards a vertical orientation, ensuring adequate height for the hooks while also injecting more dynamism into the design.

Iteration 1
Challenges Moving Forward
Throughout the design process, it is essential to consistently consider structural challenges and the limitations of wood. While this iteration successfully integrates the desired functions, it lacks structural integrity. The wooden protrusions intended as hooks are too fragile and prone to snapping, and the attachment of slats on the exterior presents additional structural hurdles. Moreover, this design featured an excess of slats, which would exceed the available space on a 4x8 piece of wood when considering the inclusion of the four bench/shelf beams.
From Horizontal to Vertical
Iteration 1 is centered on transforming the three primary functions (bench, shelves, and hooks) into a vertically-oriented design. In this iteration, particular attention is given to crafting the top shelf to accommodate the protrusion of hooks through carefully cut slats.
Iteration 2 & 3

Refining for Wood Usage and Structural Issues
In Iteration 2 & 3, my primary focus was on addressing multiple structural issues while optimizing wood usage. Firstly, to bolster the structural integrity of the hooks, I divided the top shelf into three separate pieces, each protruding through holes in the slats to form the hooks. This necessitates precise alignment of those 6 slats to accommodate the hook placement, as slats on a curved orientation would impede this process. Secondly, instead of attaching the slats externally, I devised a method where they glide through holes in the beams, enhancing overall stability. Thirdly, in order to comply with the limitations of the 4x8 piece of plywood, I adjusted the orientation and dimensions of the slats to ensure they could fit onto the sheet of wood. Finally, to enhance the overall coherence of the design, I reimagined the bench as a slatted bench style, matching its aesthetic with that of the top shelf.
Final Prototype & Drawings

Final Design Changes: Unity & Structure
Transitioning from iterations 2 and 3 to the final prototype, I implemented several key adjustments to enhance both the design cohesion and structural integrity. Firstly, I extended the design language by incorporating slats into the top and bottom beams, ensuring a unified aesthetic throughout the piece. Secondly, I refined the proportions by slightly reducing the height and increasing the width by 2 inches, enhancing both stability and visual appeal. Thirdly, I reimagined the bench structure to prioritize user comfort, rotating the slats and introducing a back piece that slides through the vertical slats, thus fostering unity across the design. Finally, I extended the length of four vertical slats by 3/4 inches to elevate the base shoe shelf slightly when placed on level ground, adding a subtle yet functional detail to the final piece.
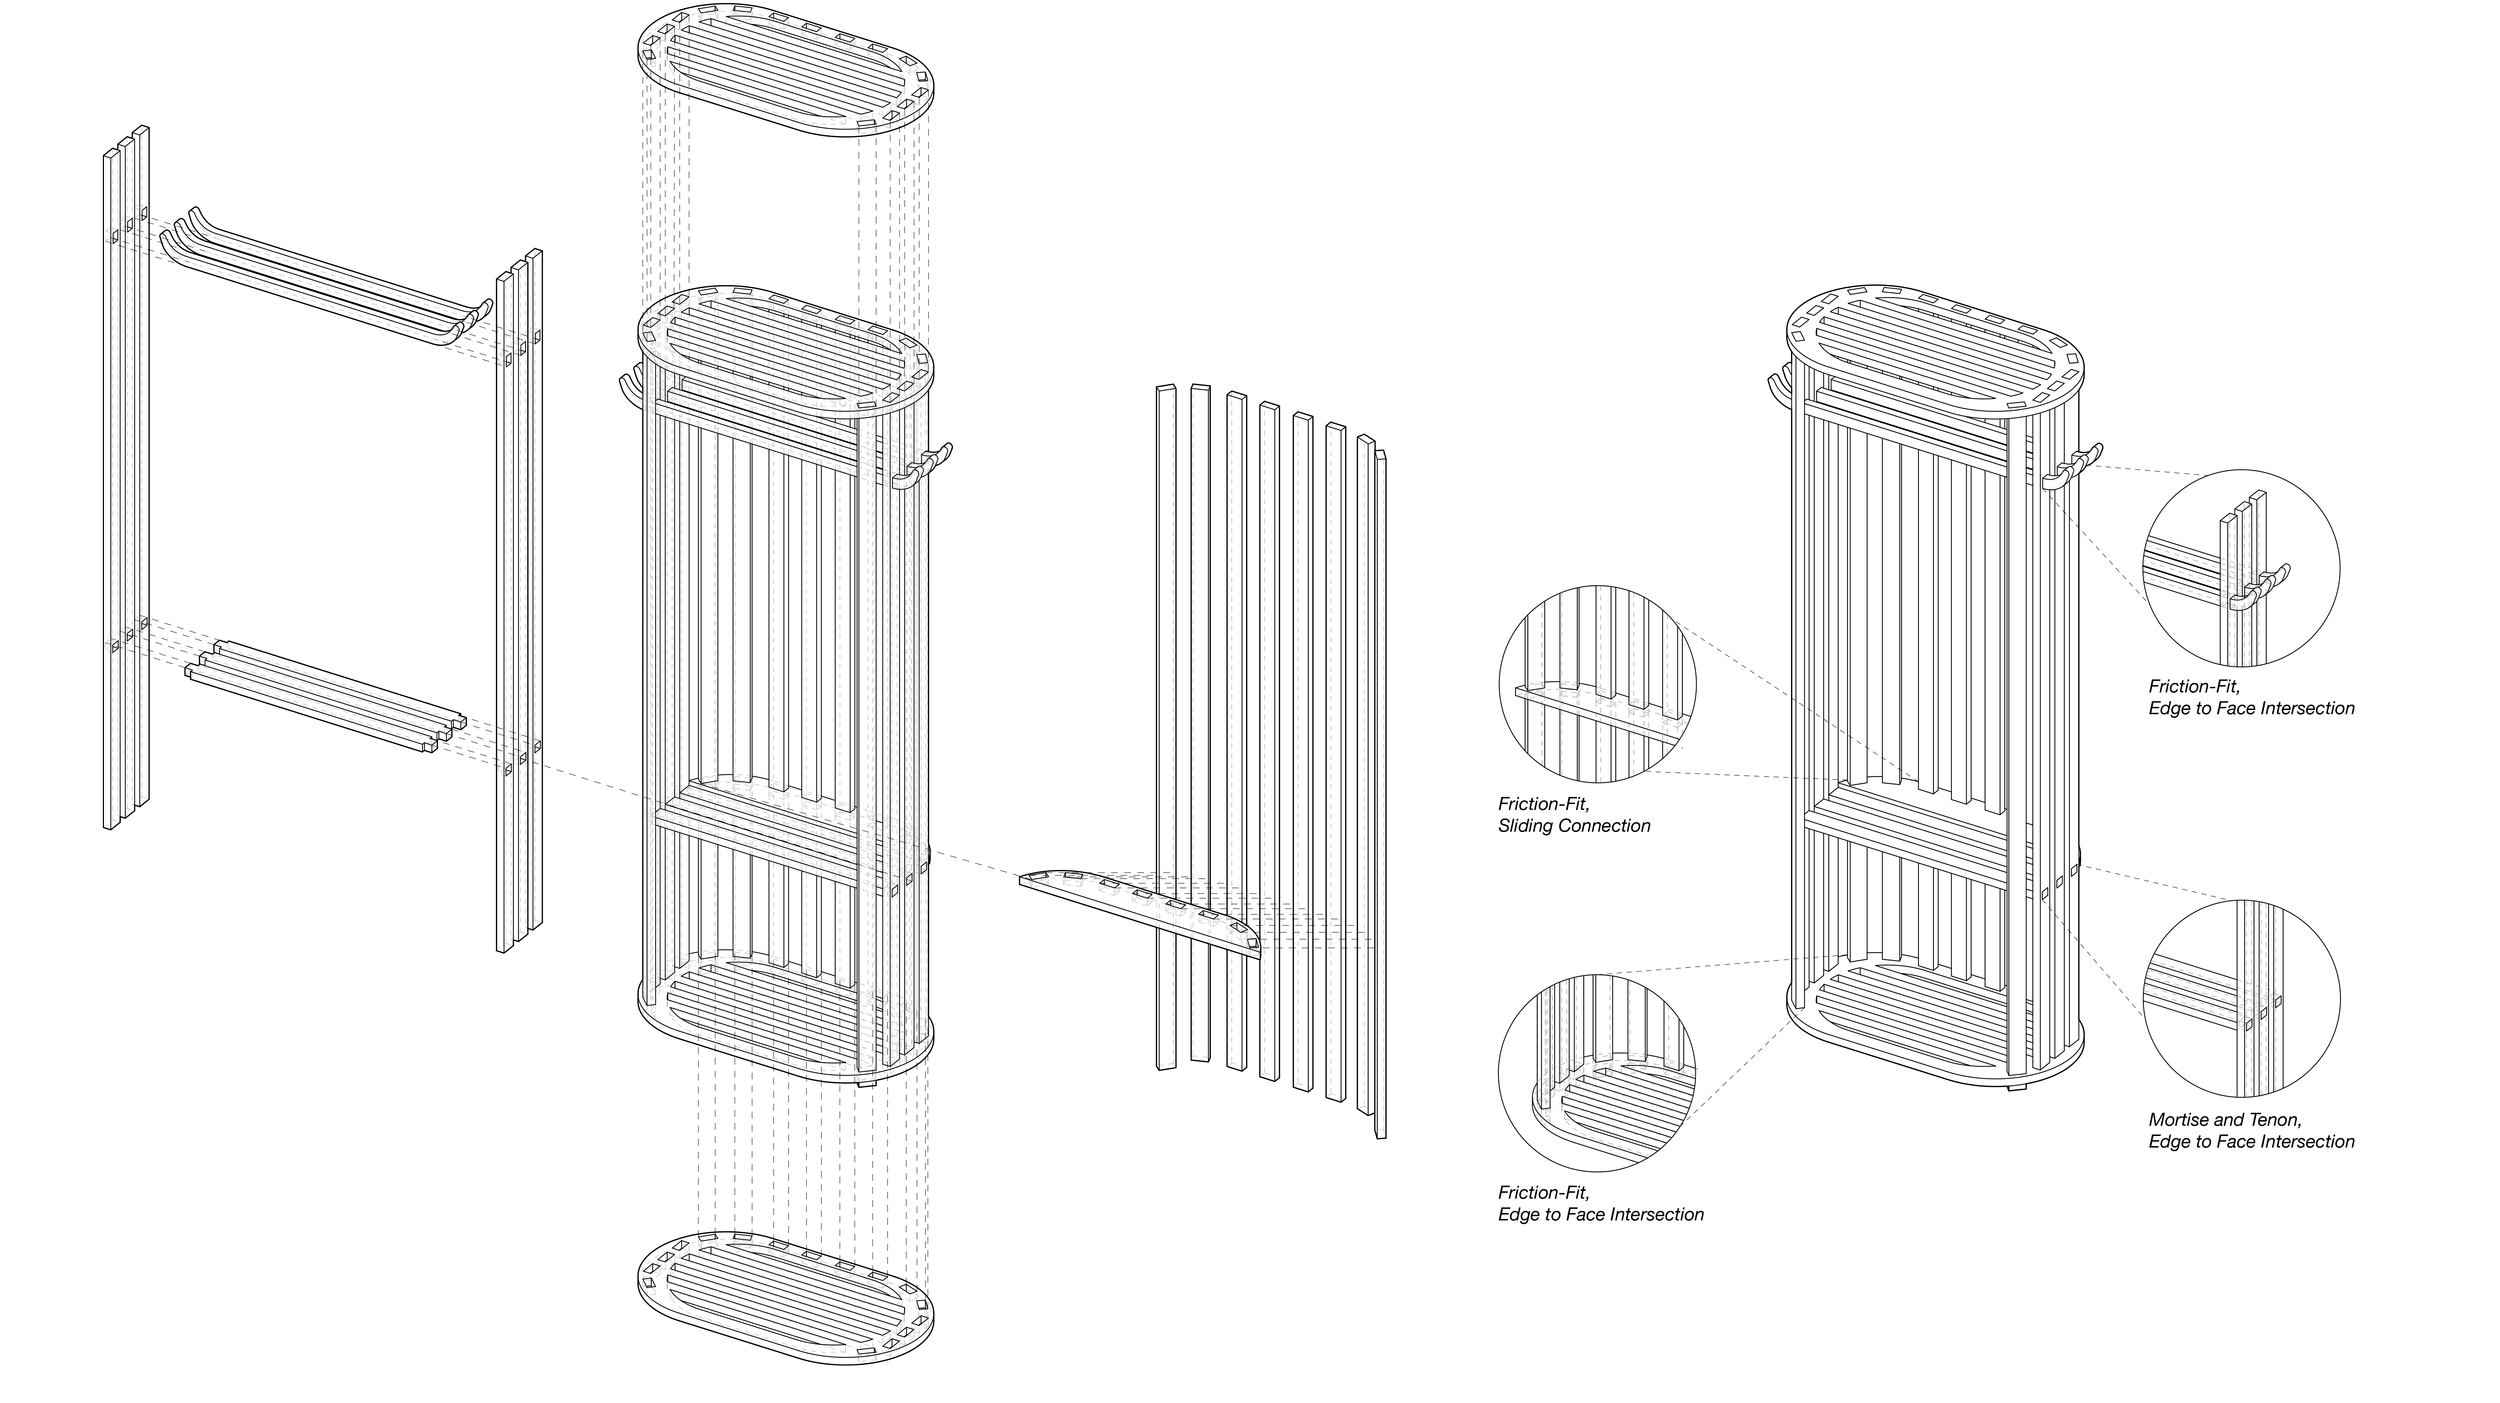
Exploded Axon & Assembly Detail
The exploded axon and assembly detail drawings meticulously illustrate the final design alterations and the construction process. In a deliberate choice, I opted to construct the piece entirely using joinery techniques, eschewing the use of screws or nails. As a result, the final product showcases the artistry and craftsmanship of wood joinery styles, reflecting a commitment to both structural integrity and aesthetic coherence.

Cut Plan
The cut plan showcases how each piece was cut, aligned on a 4’x8’ sheet. The pieces were cut using CNC Milling. Throughout every design change in the process, I continuously re-drew the cut plan to ensure all pieces fit.

Dimensioned Plan, Longitudinal, and Lateral Elevation (1” = 1/10” Scale)